 Fynchat
Set Up the AI Chatbot
Turn on the AI assistant for WhatsApp step by step — choose a provider, connect your access key, tune its tone and instructions, and set spending limits.
What is the AI chatbot?
A smart assistant that replies to your customers on WhatsApp on your behalf: it understands their messages, answers from your company information, calls tools such as product search or ticket creation, and hands off to a human agent when needed. Every setting lives on the AI Chatbot settings page.
Access to this feature depends on your plan. If you see a lock notice, it is not available on your current plan and you will need to upgrade.
Before you start
The assistant runs through one of several AI providers using your own access key (API key). Supported providers:
| Provider | Models |
|---|---|
| OpenAI | GPT‑4o / GPT‑4o‑mini |
| Anthropic | Claude Sonnet and Haiku |
| Gemini Pro and Flash | |
| Ollama Cloud | Llama, Qwen, Mistral, DeepSeek |
Create an account with one of them and get an access key from its dashboard. The provider charges based on usage (in US dollars), and you set daily and monthly limits as shown in the steps below.
Setup steps
The settings are split across tabs at the top of the page: Basics, Persona, Knowledge base, Guardrails, Usage, and Playground. Follow the steps in order.
1. Choose a provider and get a key
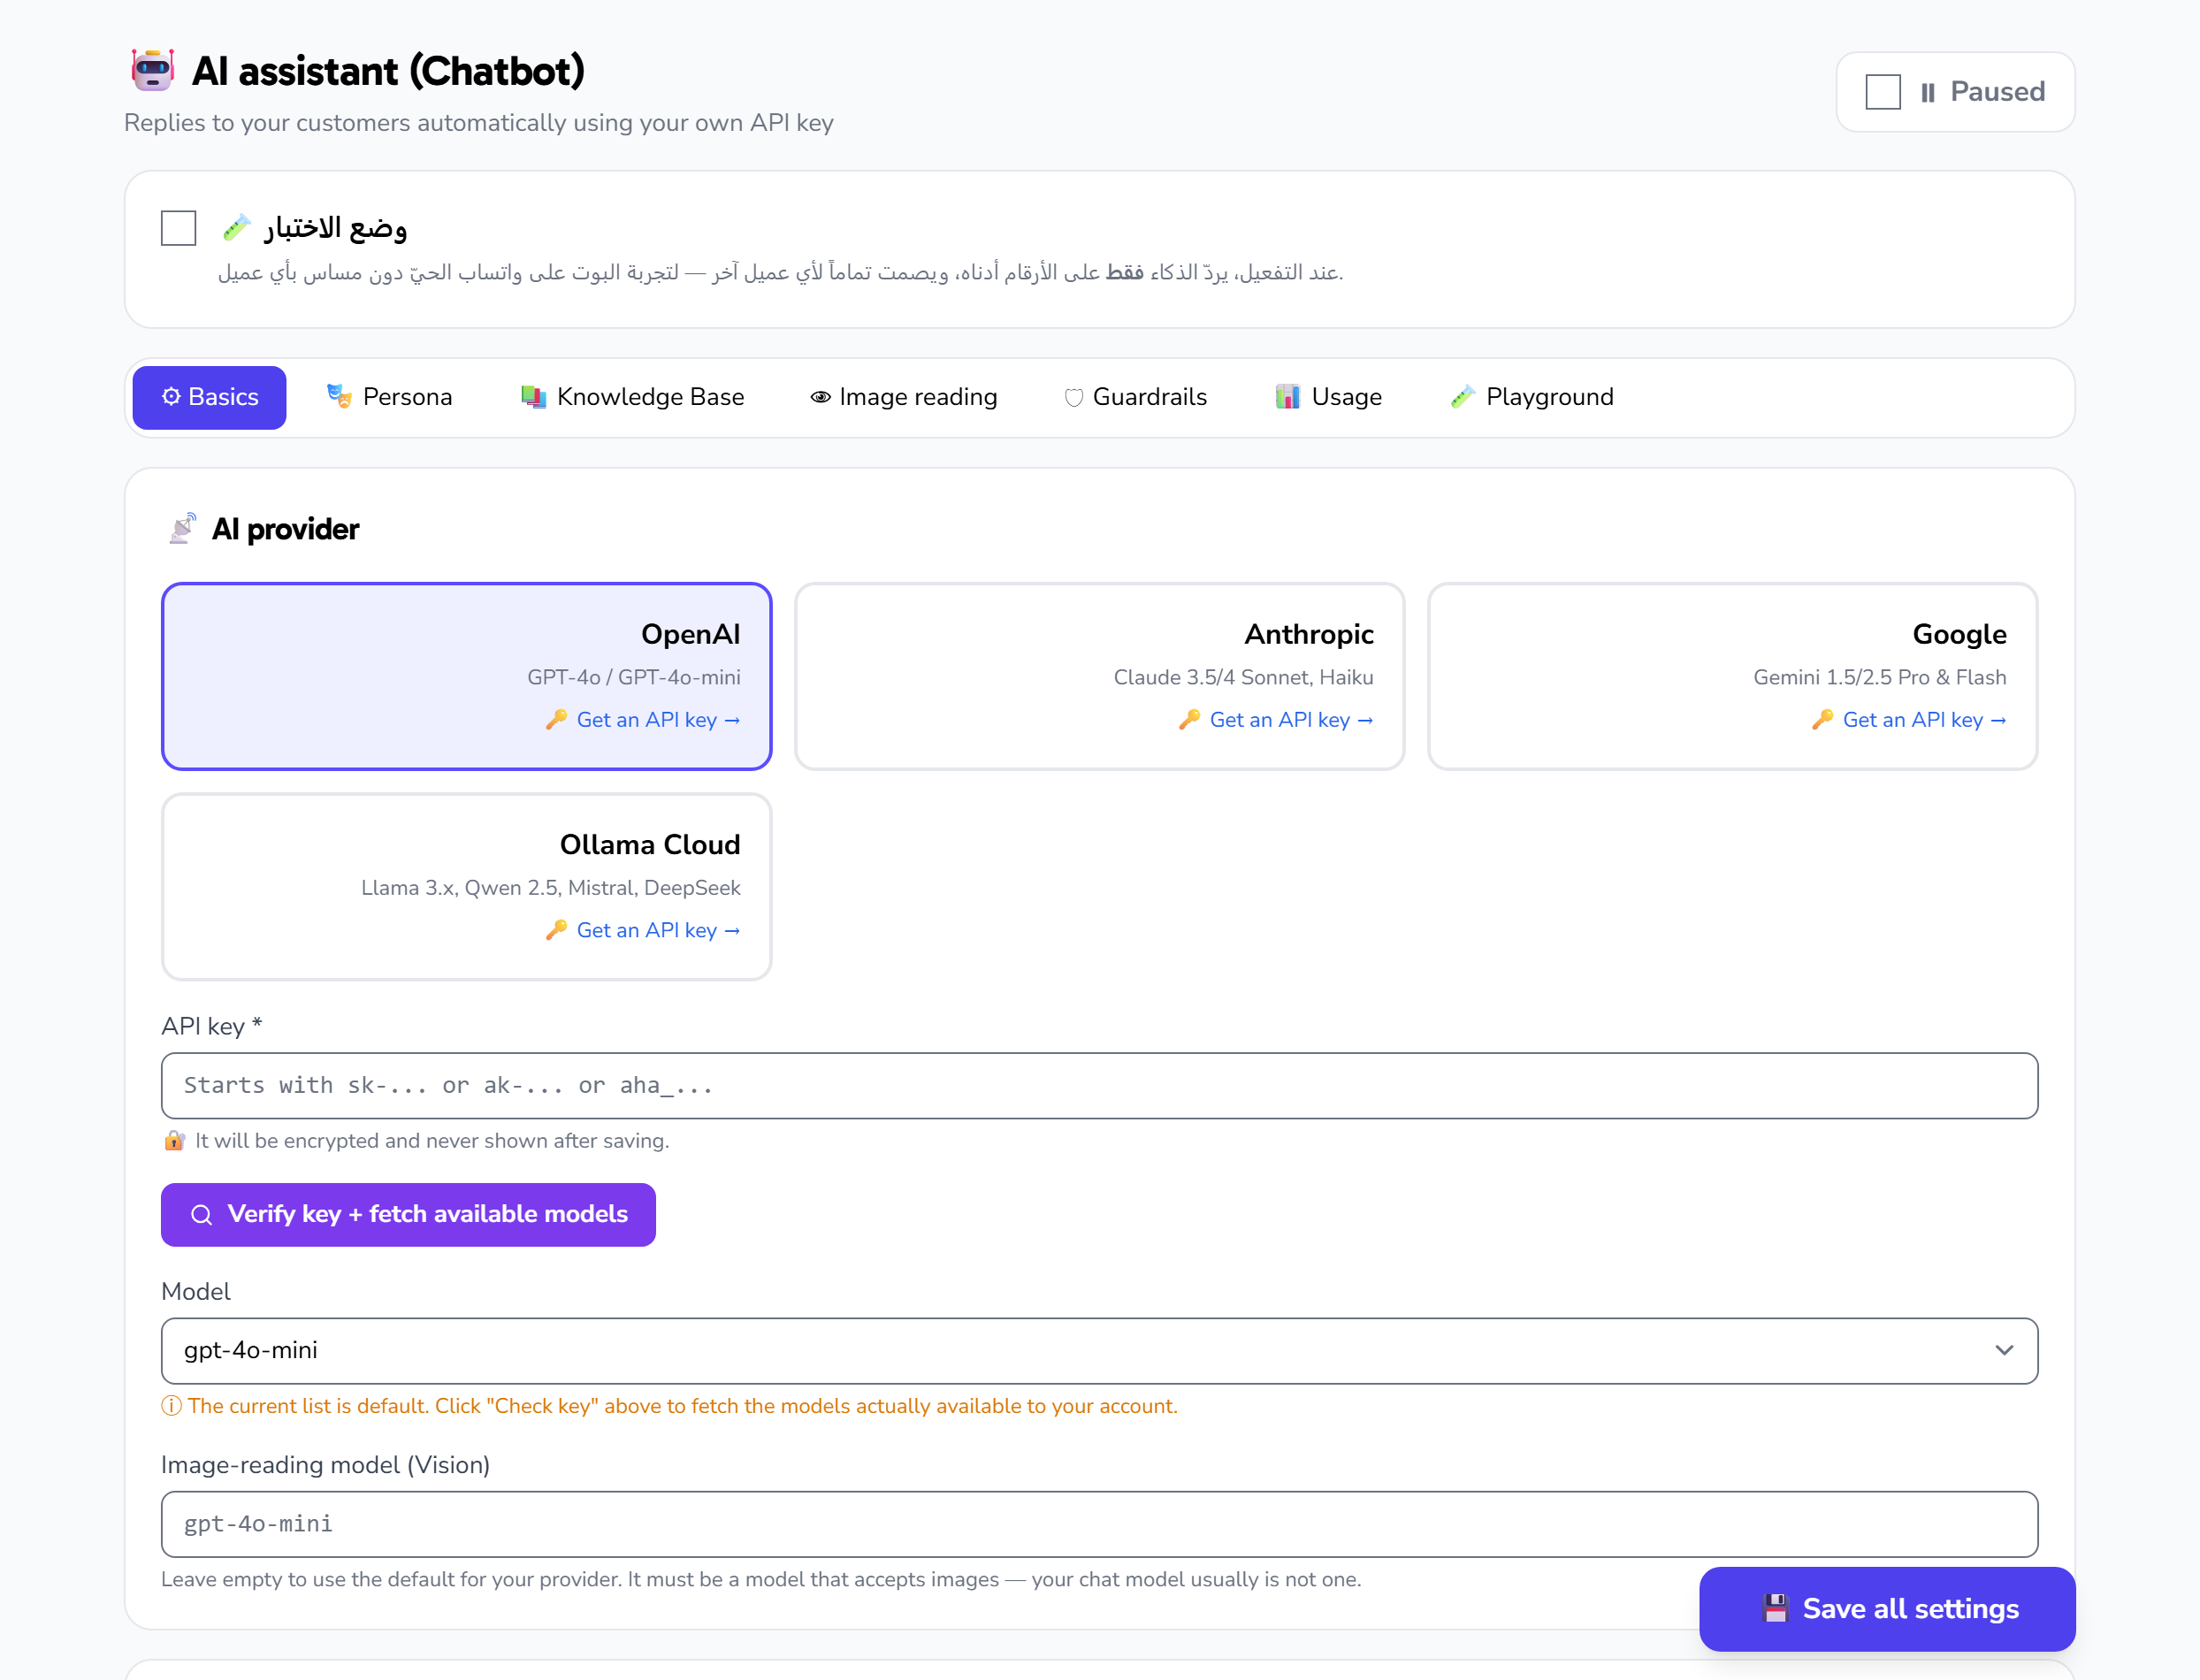
Open AI Chatbot settings, then in the Basics tab pick the card for your provider. Under each card is a direct link to that provider's key-creation page.
2. Paste the key and verify it
- Paste your access key into the Access key field.
- Click Verify key.
- The system validates the key, shows the models actually available to your account, and returns a short sample reply confirming the connection works.
If an error appears, you'll see a message explaining the cause with a link to fix it (for example, enabling billing or checking the key with the provider).
Once saved, the key is stored encrypted and is never shown in full again; the field displays only its last four digits, with a Delete key link beside it to remove it and enter a different one. For any already-saved configuration, a Test connection button also appears — it sends a quick sample message to confirm the key and model still work.
3. Choose a model
After a successful check, pick a model from the Model list. Models marked with a lock are not yet available to your account (you'll need to raise your usage limits with the provider). Start with the recommended model — it usually offers the best balance of quality and cost. (With the Ollama provider you type the model name manually instead of picking it from a list.)
4. Set the persona and instructions
Go to the Persona tab:
- Ready-made templates: pick a template that fits your business (store, car dealership, real estate, support, or general). The template fills the instructions with strict rules that prevent inventing prices or facts and keep replies short and polite. Next to the templates, a Reset button restores the instructions to the strict default text.
- Instructions (system prompt): edit the text to describe your company and tone precisely. The clearer it is, the more accurate the replies.
- Greeting message: the first message a customer receives when a conversation starts.
5. Tune reply behavior
In the same tab:
- Creativity (Temperature): a low value = precise, consistent replies; a higher value = more varied replies. Start low for support and sales.
- Maximum reply length: the number of tokens allowed in a single reply.
- Context messages: how many previous messages the assistant remembers during a conversation.
6. Set a spending cap
In the Guardrails tab, set:
- Daily budget and Monthly budget in US dollars — the assistant stops automatically once the cap is reached, protecting you from any unexpected usage.
- Work during business hours only: enable it so the assistant replies only within your working hours.
(The Guardrails tab also holds handoff keywords and escalation triggers — see the "AI tools and human handoff" article.)
7. Enable and save
- At the top of the page, switch on the Enable toggle (it flips between "Enabled" and "Disabled").
- Click the sticky Save button at the bottom of the page.
We recommend testing replies first in the Playground before enabling it for real customers. See the "Playground" article.
Monitoring usage
The Usage tab shows the assistant's cost and usage in real time. It is for monitoring only — there are no settings to change here:
- Total cards: total cost, number of calls, and number of tokens consumed.
- Today's cost: against your daily budget, with a progress bar showing how much of the cap has been used.
- Month's cost: against your monthly budget, with a similar progress bar.
- Daily usage chart: bars for each day's cost over the recent period, to spot any unusual spike.
When the provider is Ollama, an extra note appears under the total-cost card about how cost is counted for that provider.
Tips
- Start from a ready-made template and edit it instead of writing from scratch.
- Set a small daily budget at first and watch consumption in the Usage tab.
- The more accurate the information you give the assistant in the Knowledge base, the fewer mistakes it makes. See the "Knowledge base" article.