 Fynchat
The Flow Bot (Step-by-Step Reply Flows)
Build a step-by-step reply as a tree of steps — messages, questions, menus, and actions — that runs automatically on WhatsApp conversations, and test it before going live.
What is the flow bot?
The flow bot (step-by-step reply flows) lets you build a step-by-step path that interacts with the customer automatically inside a WhatsApp conversation. Instead of a single fixed reply, you build a tree of nodes: one node sends a message, another asks a question and saves the answer, a third shows a menu of options, and so on until the end of the path.
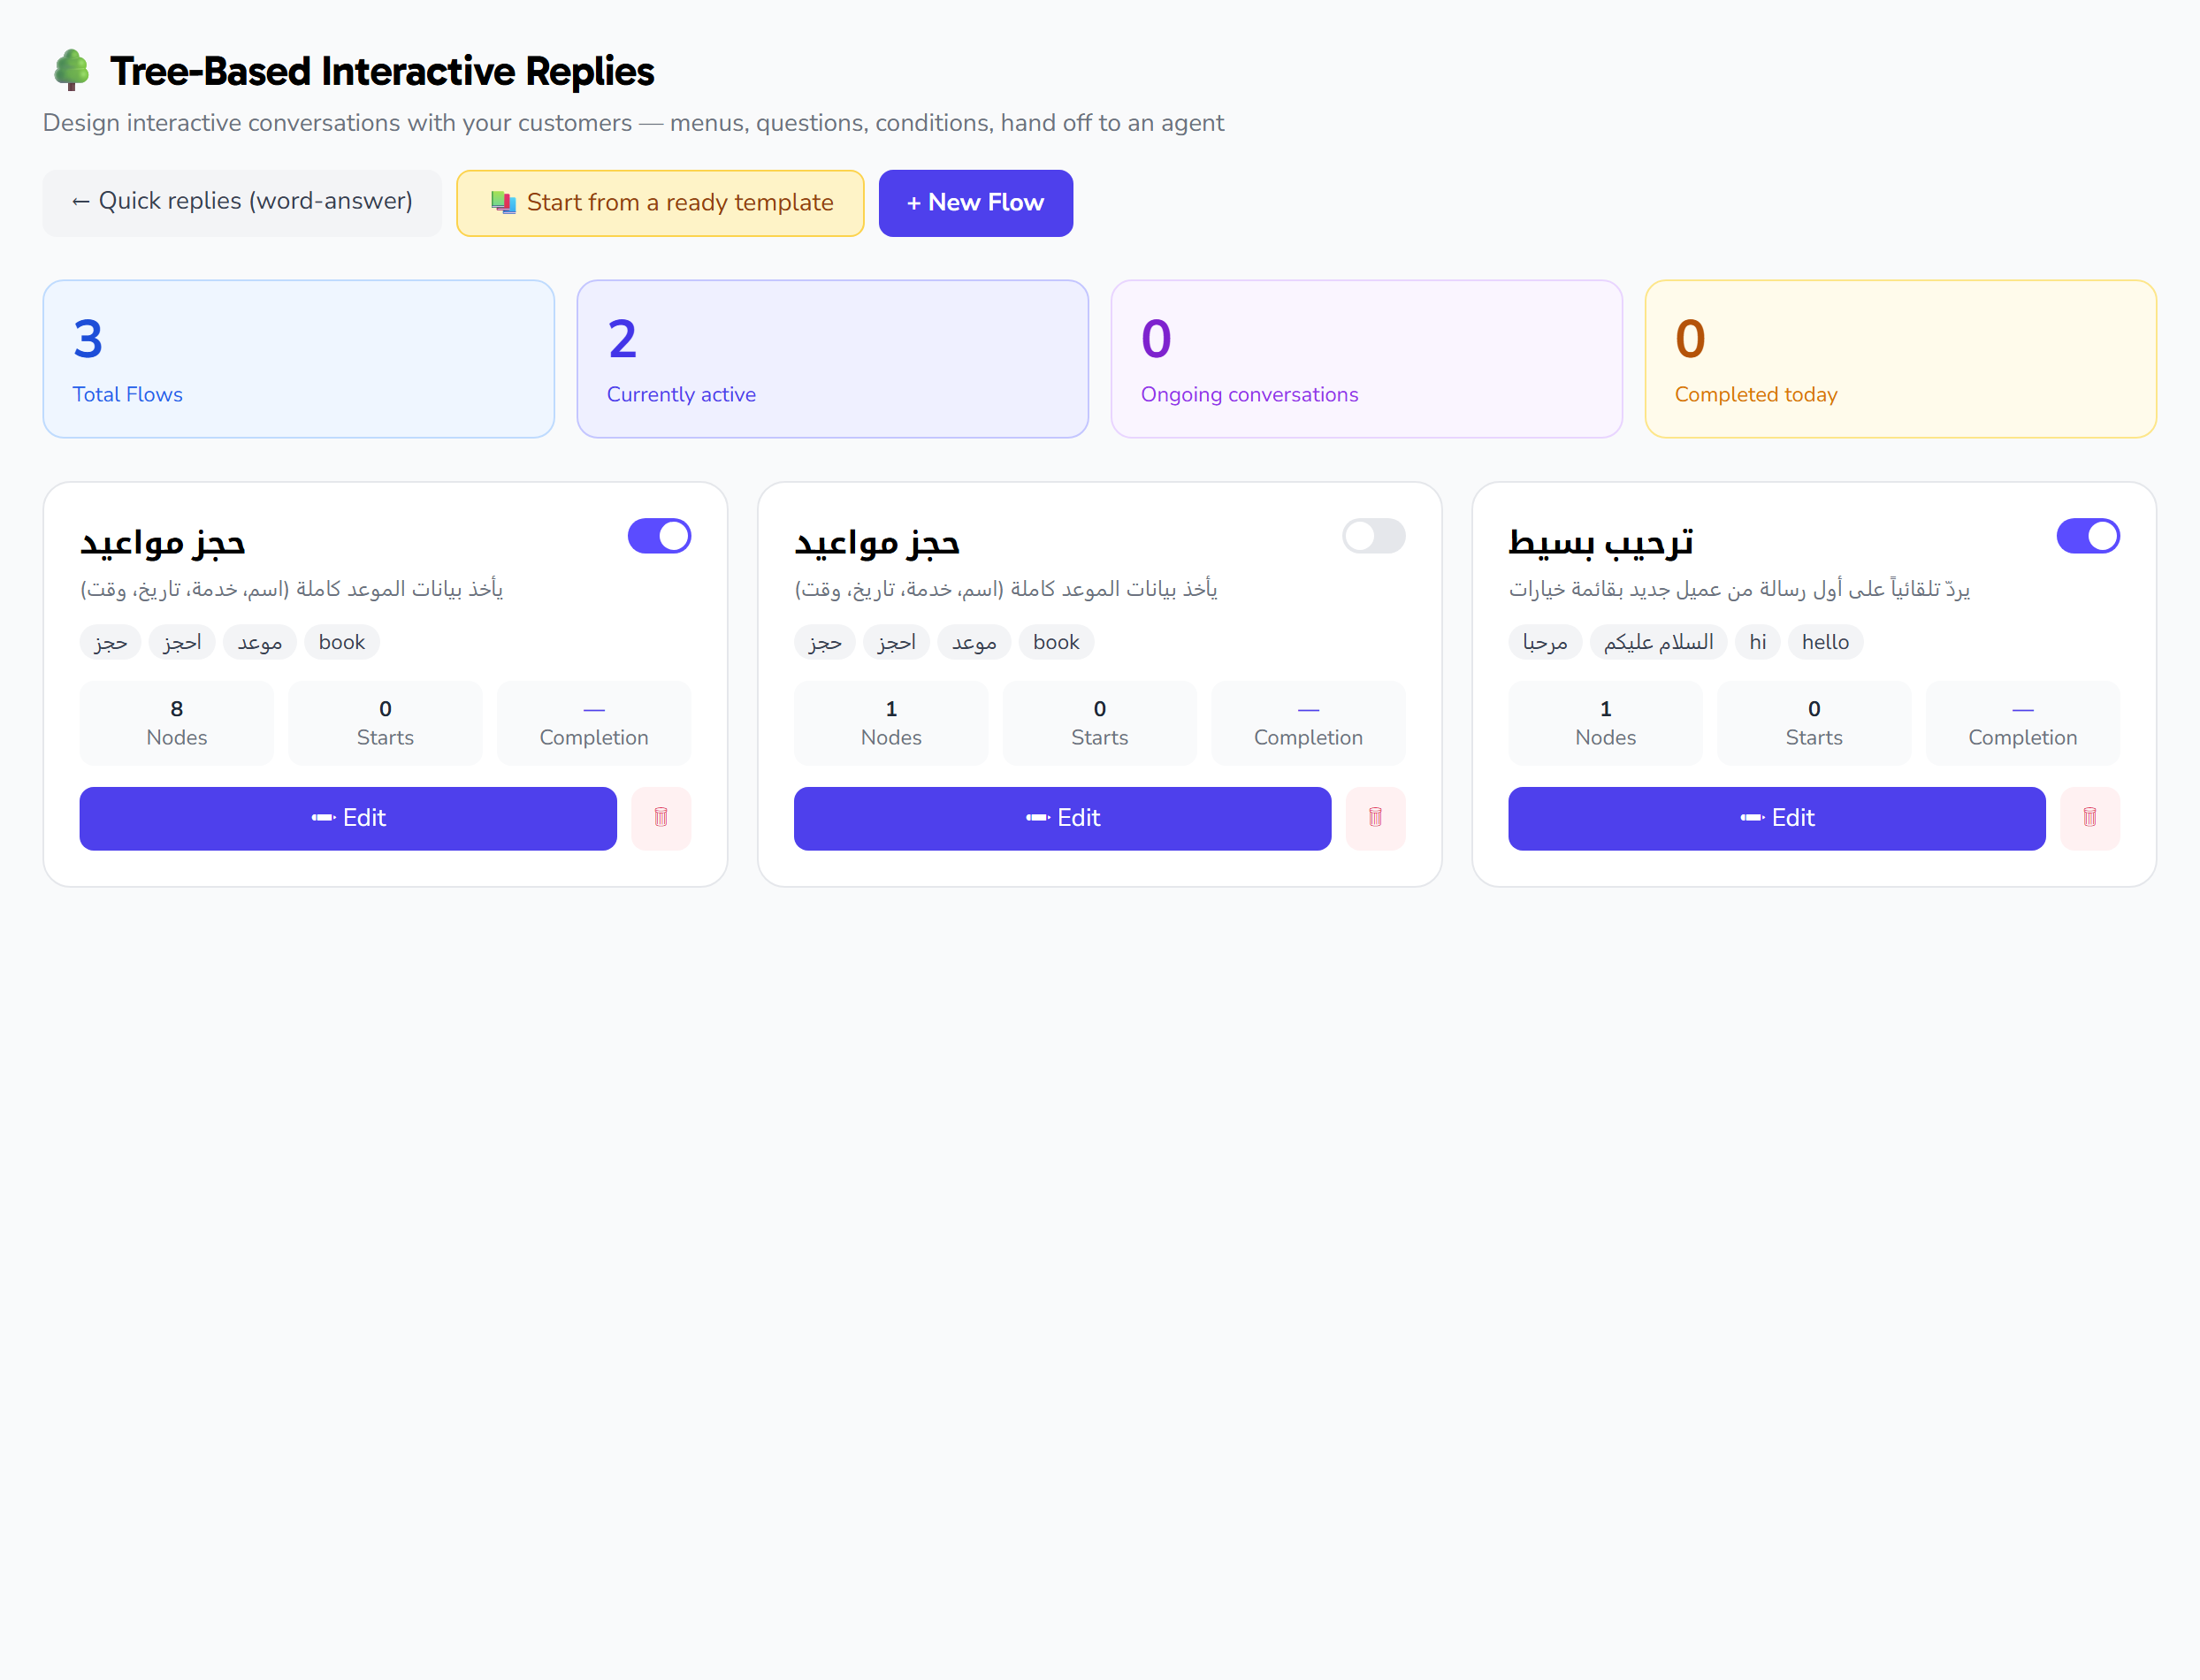
You'll find the feature at /auto-replies/flows. It's made of two pages:
- The flows page (dashboard): shows stats, a card for each flow, a create-flow modal, and a gallery of starter templates.
- The flow editor: a two-pane editor where you build the node tree, with a built-in tester that runs the flow as a dry run.
Creating a new flow
From the flows page, click the create-flow button to open a modal where you fill in these fields:
| Setting | Description |
|---|---|
| Flow name | Required text that identifies the flow (up to 120 characters). |
| Description | Optional text shown on the flow card (up to 500 characters). |
| Trigger type | Determines how the flow starts (see the table below). |
| Trigger keywords | Shown only when the trigger type is "keyword"; added and removed as chips, each up to 60 characters. |
Trigger types:
| Type | When the flow starts |
|---|---|
keyword |
When a message matches one of the trigger keywords. |
first_message |
On the customer's first message. |
manual |
Started manually; does not start automatically. |
On save, the flow is created inactive by default, and it comes with a ready-made welcome node that is set as the entry node, then you move into the flow editor to build out the rest of the steps.
Note (plan & permissions): Creating flows is subject to your plan limit. If you exceed the number of bot flows allowed on your plan, you'll see a warning that you've hit the limit and no new flow is created until you upgrade or delete existing flows. Flows are private to your organization's account.
Starter templates
Instead of starting from scratch, the template gallery offers four starter templates: welcome, booking, faq, and language. Choosing a template pre-fills the create fields (name, description, and keywords), then opens the create modal for you to review and save.
The flow editor
The editor is split into two panes: the list of nodes on one side, and the details of the selected node on the other. You add a new node, select it to edit its fields, and on any change a sticky save bar appears ("unsaved changes") to commit the change.
Node types
Each node has one type out of eight, chosen when you add the node, and the type determines which fields appear:
| Type | What it does |
|---|---|
message |
Sends message text, then moves to the default next node. |
media |
Intended for sending media (see "Notes on some node types"). |
question |
Asks a question and saves the customer's reply into a variable. |
menu |
Shows options, each linking to a next node. |
condition |
Conditional branch (see "Notes on some node types"). |
handoff |
Sends a message and hands the conversation to a human agent. |
app_action |
Runs an action from one of the apps, with parameters. |
end |
Sends a closing message and ends the flow. |
Node settings
| Setting | Shown for | Description |
|---|---|---|
| Node label | All types | Optional display name (up to 80 characters); if left blank, the node id is used. |
| Node body / message text | message, question, menu, handoff, end | The text of the sent message, supporting variable interpolation as {variable} (up to 1024 characters). |
| Save answer to variable | question | The name of the variable the customer's reply is stored into, for later reuse as {variable} (up to 60 characters). |
| Default next node | message, question | The node that runs next, or "end here." |
| Menu options | menu | An add/remove list of options, each with a label and a next node. |
| Action & parameters | app_action | Choosing the action and mapping its parameters. |
Questions and variables
In a question node, you write the question text in "Node body," and set a variable name in "Save answer to variable." The customer's reply is stored in that variable, so you can recall it in any later message by writing {variable_name} inside its text.
Menus and their options
In a menu node, you add a row per option, give it a label, and choose the next node it links to. In the tester, menu options are matched by number, id, or label, so the customer can pick by the option's number or its text.
Entry node
The entry node is the node the flow starts from. When you create a flow, the ready-made welcome node is set as the entry node automatically, and you can later make any other node the starting point: select the node and a "set as entry" button appears in its editor panel (shown only when that node isn't already the entry).
App actions (app_action)
In an app action node, you choose an action from the action registry (grouped by app), then map each parameter to the source of its value:
| Source | Meaning |
|---|---|
literal |
A value you type in directly. |
var |
A value from the flow's variables (such as an earlier question's answer). |
contact |
A value from the contact's details. |
Parameters with a fixed set of values (enum) appear as a value dropdown. The action registry is loaded from the server when the flow editor opens.
The flow tester
The tester is a chat window inside the editor that runs the flow as a dry run without sending any real WhatsApp message. It keeps each flow's state in the session, walks you through question, menu, condition, handoff, and end nodes, and replaces {var} variables with their actual values. It supports stop keywords (English stop and their Arabic equivalents) and handoff keywords (words a customer types to ask for a human agent, in either language), and has a reset button that clears the test session so you can start over.
This tester is the flow's own preview tool; it's an in-app dry run (it does not actually send over WhatsApp), and it's distinct from any separate AI playground/simulator.
Activating the flow
New flows are created inactive. Once you've finished building and testing the path, turn it on via the active toggle shown on the flow card in the dashboard and in the editor header. Turning the toggle off stops the flow without deleting it.
Notes on some node types
Two types are available in the add-node menu but are currently less complete in the editor:
- Media node (media): You can add it, but the editor does not currently show a media upload or picker control for it — only the label field appears.
- Condition node (condition): You can also add it, but the editor does not currently show a UI for setting its conditions, and in the tester it moves straight to the default next node.
Quick tips
- Start from a starter template to pre-fill the name, description, and keywords, then edit at your leisure.
- Use a question node with save answer to variable so you can address the customer by name or details later via
{variable}. - Test the whole path in the tester before activating it, and try the stop and handoff keywords.
- Don't activate a flow until you're sure its node links are correct; new flows stay inactive until you turn them on yourself.
- Keep an eye on your plan's flow limit before creating more.