 Fynchat
Conversation requests
Organize your customers' requests into categories and stages, with search, filtering, agent assignment, and per-stage automation (notifications, SLA, auto-distribution) — all from the /requests page.
What are "Conversation requests"?
Conversation requests (Requests) is a central feature at /requests for tracking lightweight, categorized items opened from conversations and the inbox. Each request has a reference number/title, a priority, a category, a stage, an assigned agent, and a contact (name and number). From this page you move a request between stages, assign it to an agent, search and filter, convert it to an order, or delete it.
The Requests feature is central and available to every account and every user — no specific plan and no special permission are required. Some buttons do depend on the installed apps, though: the "Auto-process" selector only appears based on the installed apps, and the "Convert to order" button only appears when the Orders app is installed. Request visibility may also be narrowed for store members based on the store scope.
Where do requests come from?
There is no tool on this page to create a new request manually; requests are created elsewhere — directly from the conversation/inbox. The job of the /requests page is to display these requests, categorize them, move them between stages, assign them, convert them, and delete them.
The list interface: categories and stages
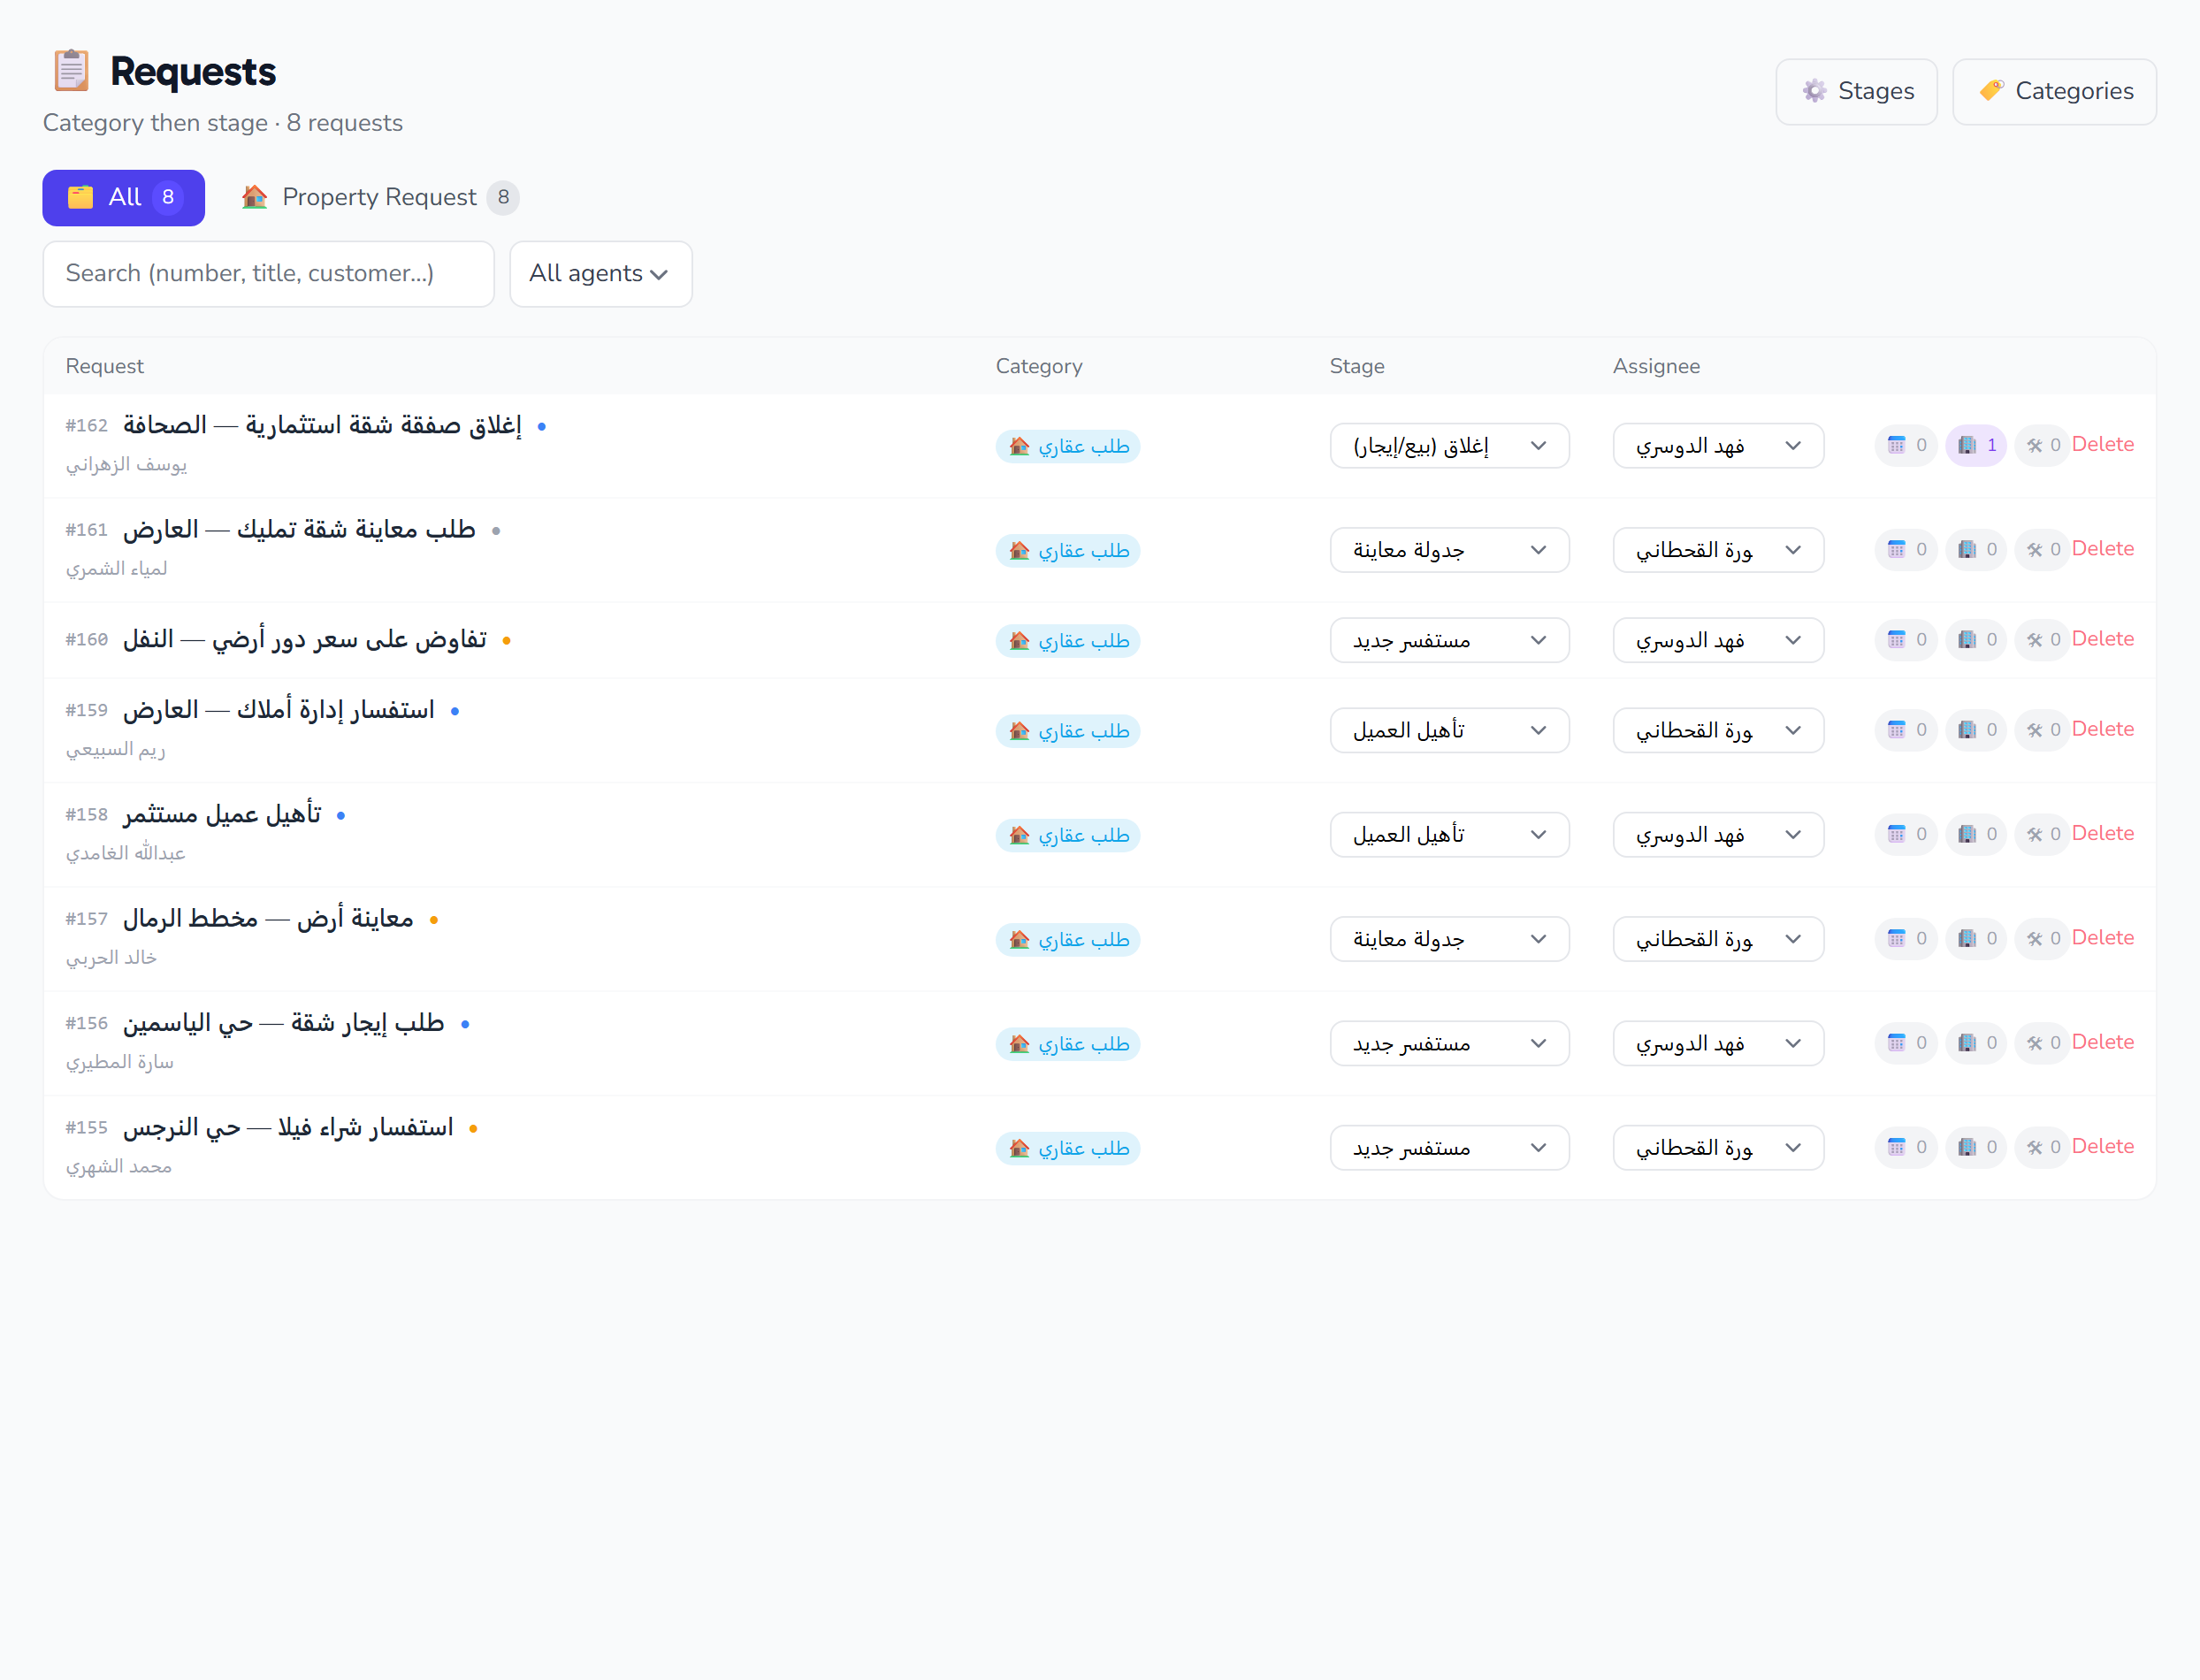
The page shows the list of requests with two consecutive tab strips:
- The categories strip at the top — each category with an emoji and its name.
- The stages strip below it — the stages of the selected category, each with its own color. Selecting a stage narrows the list to requests in that stage.
Alongside them: a search box and an assignee filter.
What does a request row show?
| Element | Description |
|---|---|
| Reference number/title | A link that opens the request's detail page at /requests/{id} |
| Priority dot | A color cue for the request's priority: low / medium / high / urgent |
| ⏱ SLA badge | Appears only when the stage's time limit is exceeded (see automation below) |
| Contact | The customer's name or number |
| Per-row stage dropdown | A dropdown to move the request to another stage of its category |
| Per-row assignee dropdown | A dropdown to assign/unassign the request to an agent |
| Convert to order | An action shown only when the Orders app is installed, and under conditions (see below) |
| Delete | Deletes the request after a confirmation |
Search and filtering
- Search requests — instant search within the displayed list across: id/reference/title/description/contact name/number.
- Filter by assignee — show a specific agent's requests, or "All agents".
Managing categories
The 🏷️ Categories button opens a modal to manage categories: add and delete.
| Field | Description |
|---|---|
| Category name (Arabic) | The display name in Arabic, entered when adding a category |
| Category name (English) | An optional English name, shown when the interface locale is English |
| Category emoji | The emoji icon shown on the category tab/badge |
| Auto-process | Chooses which installed app auto-processes new requests in the category (Orders / Real-estate / Support tickets) or "Manual" = none. Only shown when at least one capable app is installed |
Managing stages
The Stages button opens a modal to manage the category's stages: add, edit, and delete. (When a stage is deleted, its requests are moved to a fallback stage.)
| Field | Description |
|---|---|
| Stage color | The color of the stage tab and dot |
| Stage name (Arabic) | The stage's name in Arabic |
| Stage name (English) | An optional English name |
| Reference status | Maps the stage to a coarse status: open / in_progress / done / cancelled; when it changes, the system re-syncs the request's status and closing date |
| Closing stage | Marks the stage as a closing stage; entering it sets the closing date and hides the "Convert to order" button |
| Notify customer | Sends the customer a WhatsApp update when a request enters this stage |
Inside the same modal there is a reduced automation set per stage (see the next section).
Stage automation
Each stage has automation settings that run when a request enters it. A reduced set lives inside the Stages modal, and a fuller set lives on the standalone Requests settings page.
| Field | Description | Where it appears |
|---|---|---|
| Assignment on entry | The auto-assignment mode: none / manual / least busy / round robin / specific agent (plus "department" on the settings page) | Both |
| Specific agent | Shown when "specific agent" is selected, to choose the assigned agent | Both |
| Department | Shown when "department" is selected — assigns to the least busy agent within the department | Settings only |
| Only if unassigned | Restricts auto-assignment to requests that are not already assigned | Settings only |
| Notify the agent | Notifies the agent who gets auto-assigned the request | Settings only |
| Send a template on entry | Enables sending a WhatsApp template to the customer when a request enters the stage | Both |
| Notification template | Chooses the approved template to send; a Utility template is recommended so it delivers outside the 24-hour window | Both |
| Once per request | Sends the template at most once per request | Settings only |
| Smart condition: min priority | Runs the automation only when the request priority is ≥ the selected level (Any / medium / high / urgent) |
Both |
| SLA minutes | The number of minutes allowed in the stage; when exceeded, the ⏱ SLA badge appears on the row | Both |
The Requests settings page
The header link ⚙️ Requests settings opens a standalone page at /requests/settings that lays out each category's stages as cards, with the fuller automation controls described above: the assignment mode including "department", "only if unassigned", "notify the agent", the notification template with "once per request", the smart minimum-priority condition, and the SLA time limit.
Converting a request to an order
The Convert to order action appears on the row when all of these conditions are met:
- the Orders app is installed,
- the request has a category,
- no orders are linked to it,
- and its current stage is not a closing stage.
Reference status and closing
Every stage is mapped to a coarse reference status (open / in_progress / done / cancelled). The system keeps the request's status and closing date in sync with this status; entering a closing stage sets the closing date and hides the "Convert to order" button.
Quick tips
- Use categories to separate request types, and stages to track their progress.
- Set an SLA time limit on time-sensitive stages to catch overdue items via the ⏱ SLA badge.
- Configure the fuller automation from the settings page: auto-distribution, agent notification, and a once-per-request template.
- Make the customer-notification template a Utility template so it delivers outside the 24-hour window.